What Does a Roofer Do?

Roofer

Roofers Brigantine NJ repair, replace, and construct roofs. They analyze building plans to ensure that roofing is completed in strict compliance with the design. They also determine the appropriate substrates, materials, and supporting accessories for roof installations.

Roofers work mostly in warm climates with high demand for their services. They usually work as part of a larger team and must communicate effectively.

Roofer

Unlike residential roofs, commercial buildings serve multiple purposes and must be durable enough to hold various types of equipment. Because of this, commercial buildings usually require different materials than a traditional home or apartment. Commercial roofing contractors use products from the best manufacturers in the business, so they are able to provide their clients with a long-lasting, high-quality roof.

Commercial roofs, in contrast to residential roofs, have multiple uses and need to be sturdy enough to support a wide range of equipment. For this reason, the materials needed for commercial buildings are typically different from those needed for residential ones. Using materials from the top manufacturers in the industry, commercial roofers are able to offer their customers a high-quality, long-lasting roof.

Choosing the right commercial roofing contractor is critical to ensure that the roof lasts as long as possible and protects all of the important things inside. If a business owner hires an unqualified roofing contractor, they can expect to pay more for repairs and replacements in the future. Not only that, but hiring an inexperienced roofer may void the manufacturer warranty on their roofing materials.

In order to guarantee that the roof lasts as long as possible and protects everything inside, selecting the best commercial roofing contractor is essential. A business owner should anticipate paying more for future repairs and replacements if they choose to work with an unqualified roofing contractor. Furthermore, using a novice roofer could void the roofing material manufacturer’s warranty.

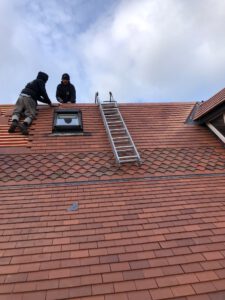
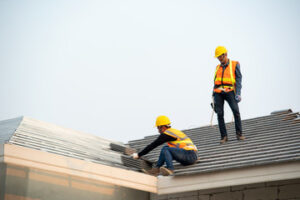
Commercial roofers often work on taller buildings than residential roofers, so they need to be comfortable working at heights. They also need to be physically fit, as the job is very physical and requires the ability to lift heavy objects and remain confined in awkward positions for extended periods of time.

Commercial roofers must be at ease working at heights because they frequently work on taller buildings than residential roofers. Due to the physically demanding nature of the work, which includes lifting large objects and spending a lot of time in uncomfortable positions, they also need to be in good physical shape.

Managing commercial clients can be challenging because the client usually has a lot of people involved in the project. Skujins recommends that his clients keep the number of points of contact to a minimum and stick with one point of contact for all of his projects. This allows him to manage expectations and avoid conflicting instructions from multiple parties.

Taking care of commercial clients can be difficult since they typically have a large team working on the project. For all of his projects, Skujins advises his clients to maintain a single point of contact and limit the number of points of contact to a minimum. By doing this, he is able to control expectations and steer clear of contradicting directives from various sources.

Roofers who specialize in industrial building work install, repair, and maintain roofs that support heavy loads or a variety of materials. These workers often have more in-depth education and experience, such as a bachelor’s degree in business or industrial technology. They also undergo specialized training and are licensed or certified in their specialty. These workers are often self-employed, but they can also be employed by construction companies or roofing manufacturers. Visit to find out more about the career outlook for roofers, including job duties, education, and training requirements. You can also compare the pay and benefits of this occupation to similar jobs in different industries.

Roofers with expertise in industrial building construction install, fix, and maintain roofs that can hold a range of materials or heavy loads. These employees frequently possess more advanced training and expertise, such as a bachelor’s degree in industrial technology or business. In addition, they receive specialized training and obtain a license or certification in their field. Although they may work for themselves, these laborers can also be hired by roofing manufacturers or construction firms. Visit to learn more about the employment outlook for roofers, as well as the qualifications, training, and educational requirements. The salary and benefits of this profession can also be compared to those of comparable positions in other industries.

The roof of any building is an important structure, and it must be properly maintained to ensure a long service life. If you’re in the market for a new roof, or need to have your current roof repaired, it’s important to find a professional and experienced roofing contractor. A roofer can help you with a variety of roof issues, from minor repairs to re-roofing or replacing the entire roof system.

Any building’s roof is a crucial component that needs to be properly maintained to have a long service life. A professional and experienced roofing contractor is essential if you need to repair your current roof or are in the market for a new one. A roofer can assist you with a range of roof problems, from small fixes to roof replacements or re-roofings.

Specialty roofers are professionals who specialize in the construction of roofing systems. They are skilled in working with a variety of materials and can handle both commercial and residential projects. They are also well versed in the latest roofing technologies. They can provide you with a wide range of services, including installation and replacement of shingles, gutters, skylights, and insulation.

Professionals that specialize in building roofing systems are known as specialty roofers. They can handle both residential and commercial projects and have a wide range of material skills. They also know a lot about the newest advancements in roofing technology. They can offer you a variety of services, such as insulation, skylight installation and replacement, gutter cleaning, and shingle installation.

There are many ways to become a certified roofer. You can complete a training program, pass an exam, or join an apprenticeship to get the skills you need to start work in the field. Some states also require that roofers be licensed. The licensing process varies by state, but it typically involves taking a course, passing an examination, and providing proof of insurance.

Getting certified as a roofer can be done in a lot of ways. To acquire the knowledge and abilities required to begin working in the field, you can finish a training course, pass an exam, or enlist in an apprenticeship. Roofers may also need to have a license in some states. Each state has its own licensing requirements, but generally speaking, it entails completing a course, passing an exam, and presenting proof of insurance.

While it may be easy to get caught up in the details of a roofing job, it’s equally important for a roofer to pay attention to the big picture as well. This means making sure that all of the necessary permits have been filed, ensuring that all of the appropriate inspections have taken place, and following up with customers after a job is completed.

Founded in 2007 by Cole Bakker and Mike Miller, is a family-owned business that prides itself on honesty and quality workmanship. The company offers both residential and commercial roofing, and is licensed in multiple states.

Customers praise the company for its prompt communication and meticulous work. They also appreciate the company’s willingness to provide financing options.

The company is one of the few roofers in the nation to be awarded GAF’s Master Elite status, an honor that only two percent of roofers earn. Additionally, they are a member of the Better Business Bureau and have an excellent reputation in their local community.

Asbestos Removal

Asbestos Removal

Generally, asbestos materials in good condition and not disturbed do not pose a health risk. Damaged asbestos can release harmful fibers that can be inhaled or ingested.Asbestos Removal

Asbestos abatement identifies, repairs, removes, or encapsulates asbestos-containing building materials in structures. This includes demolition and renovation. For more details, visit https://www.perthasbestosremovalwa.com.au/.

Before asbestos removal can begin, the contaminated areas are decontaminated to prevent the spread of dangerous asbestos fibers throughout a house or other structure. Contractors must remove all traces of asbestos in the work area, including dust and fibers in clothing and hair, and clean any equipment they bring into the work area. They must also seal the area to keep airborne asbestos fibers from entering the rest of the building. Finally, workers must shower before leaving the regulated area and must wear street clothes when they leave.

A critical barrier is one or more layers of plastic sealed over all openings into a regulated work area. Other physical barriers may be used to separate the regulated work area from adjacent spaces. They should be located at the perimeter of the regulated work area, and must be placed in accordance with the recommendations of the National Institute for Occupational Safety and Health, or the Director.

In addition to a critical barrier, there must be an equipment room, shower area and a clean change/changing room for the decontamination of workers, materials and equipment. The equipment room must be separated from the regulated area by an asbestos contaminated waste container pass-out airlock, or a decontamination enclosure if no separate airlock has been constructed.

Upon exiting the regulated area, workers must immediately remove their respirator, and then wash any visible asbestos contamination from their clothing and footwear in a shower that is not adjacent to the regulated work area. They must also wash their hands before eating, drinking, smoking, chewing gum or tobacco and using the toilet. After all of this, they must don their street clothes in the clean change/changing room and then enter the nonregulated area of the building through a trash container pass-out or decontamination airlock (or through the decontamination enclosure if no separate airlock is built).

The decontamination process must be repeated whenever employees reenter the regulated work area, after breaks during the work shift, when they quit or at the end of their shift. Any reusable protective clothing that has been used in the regulated work area must be double bagged, sealed and labelled as asbestos contaminated before being removed from the equipment room for disposal or laundering.

Removal

A professional contractor conducts asbestos abatement to remove and encapsulate materials that are considered hazardous or damaged. This is usually done in homes that were constructed before 1980. During this process, the contractor follows strict procedures to ensure that airborne asbestos fibers are not dispersed into unaffected areas of the home.

Even minor repairs can release asbestos fibers, so it is recommended that a professional handle any renovations and remodeling work. To prevent the dispersal of asbestos particles, the contractors wet down the area to be worked on. They also use a “negative air” machine that draws the air from the abatement area through a series of filters, including a HEPA filter to remove asbestos particles. The filtered air is then exhausted to the exterior of the building. The contractors take a sample of the asbestos material in the area that will be disturbed and send it to an accredited laboratory. The results are used to determine whether the disturbed material poses a health risk.

It is important to note that the asbestos regulations require an inspection and notification before any demolition or renovation activities are conducted in facilities where asbestos-containing materials are present. The DNR offers a variety of services to help property owners, facility operators and maintenance workers comply with the rules.

Many homeowners who have asbestos in their homes do not need to worry about it unless it is likely to be disturbed during renovation or repairs. The most common home construction materials that contain asbestos are floor tiles, shingles and pipe insulation. However, other materials such as caulking, mastics and ceiling texture can also be asbestos-containing.

Although it is not necessary to replace any asbestos materials in a home, some homeowners may choose to do so to improve the appearance of their home. The best way to do this is to hire a professional who has completed proper federal and/or state-approved training. It is also advisable to consult with the DNR or an accredited asbestos consultant before making any decisions regarding the replacement of any asbestos-containing material in a home. There have been reports of unscrupulous companies encouraging unnecessary asbestos removals or performing such removals improperly.

Disposal

Asbestos is a toxic mineral that can cause mesothelioma and asbestosis when inhaled or ingested. Hiring a licensed abatement contractor is the best way to keep yourself and others safe from this harmful substance. These professionals know the proper procedures and regulations to follow during removal and disposal to prevent exposure.

After removal, the contractor seals off the area where the work is being done to prevent the spread of fibers. They also use HEPA air filters and clean air exhaust ducts to filter the air inside the enclosure and trap any stray asbestos dust outside. When the contractor is finished, they will perform air monitoring to ensure that the asbestos levels are not increasing and that the job was completed properly.

The asbestos waste is then packed in leak-proof, non-returnable containers such as plastic bags of at least 6mil thickness, cartons, drums, or cans. Before packing, the asbestos-containing material is wetted down to reduce the likelihood of fibers escaping in the event of damage or leaking. The container is then wrapped and sealed with packaging and duct tape, and the entire package is labeled to indicate that it contains asbestos waste. The containers are then placed in a vehicle that is approved to transport hazardous waste and taken to an asbestos landfill or waste transfer station for disposal.

There are a few ways that asbestos can be recycled once it has been removed from the home. One method involves putting the asbestos through a process of thermal decomposition. This breaks down the fibers and transforms them into a non-toxic, inert mineral that can be reused. Another method uses a microwave thermal process to break down the asbestos into a glass-ceramic material. The resulting product can be used to make ceramic tiles and other household products.

Monitoring

Schools that are affected by asbestos-containing materials should make sure they have an asbestos management plan (AMP). The AMP should include periodic surveillance, inspection/reinspection, abatement/remediation, and response/post-response actions. School officials should also consider increasing their awareness and understanding of asbestos abatement regulations, including air monitoring during and after abatement.

During abatement, air quality tests are required to ensure that asbestos dust and fibers are not released into occupied areas of the building. A number of different testing strategies are used, and the appropriate method is determined by a variety of factors, including the type of asbestos, previous activities, etc. PCM testing is generally used for non-friable work, whereas TEM testing is typically utilized for friable asbestos abatement projects.

Prior to the start of abatement, a background air test must be performed. This test involves putting a known volume of air through a filter, which is then counted to determine the concentration of asbestos fibres present in the air. This is an important measurement to use as a benchmark for later test results.

When the background air test has been completed, clearance monitoring can begin. Clearance monitoring is a process of taking static or positional samples in, and immediately surrounding, the asbestos removal work area to ensure that airborne asbestos fibre levels remain below an exposure standard. It is necessary to wet the sampled material using a fine mist of water containing a few drops of detergent before taking the sample. Patching the sampled area with duct tape may also be helpful to prevent release of additional fibres. The samples are then sent to an NVLAP-accredited laboratory for analysis.

Following abatement, school officials should work with the consultants to verify that all ACM has been removed, the area has been thoroughly cleaned and a standardized visual inspection has been conducted. In addition, satisfactory clearance air monitoring in compliance with AHERA must be completed. In some cases, hiring an independent contractor to perform clearance monitoring may be necessary. This makes the owner confident that all AHERA requirements have been met.

How to Know Where Your Property Lines Are Before You Build a Home Fence

fence

R.C Fence LLC makes it harder for would-be trespassers to enter your property. Keeps kids and pets safe inside the yard. It can also add to the curb appeal of your house.

fence

If you want to build a fence, be sure to talk with your neighbors first. A fence may upset them if they feel it obstructs their view or hurts their property.

As a homeowner, you likely have a general idea of where your property lines are. The driveway, the border of your lawn and even your fence might serve as visual markers. But these landmarks may not necessarily align with your property line, so it’s important to be aware of the true boundaries of your land before you start building a home fence.

Knowing your property lines helps you avoid encroachment on your neighbor’s land, which could potentially lead to a legal dispute. This is especially important when it comes to installing a fence, as many laws stipulate that fences must be at least 2 – 8 inches from the property line to prevent encroachment. It’s also critical to be aware of your property lines when it comes to landscaping and planting, as any plants or trees that stray over the property line could potentially become a problem in the future.

While it’s possible to find your property lines by using various methods, the most thorough approach is to hire a professional surveyor. A licensed surveyor will be able to determine your property line by walking the land and searching for survey pins that are set in the ground. In most cases, you’ll be able to obtain a copy of your property survey from your county’s recorder office. In some cases, you might be able to locate the property surveys for nearby homes that were recently purchased, as these documents typically contain helpful information about property lines and rights of way.

In addition to determining property lines, a professional surveyor will also be able to help you navigate any local zoning ordinances and regulations regarding the installation of a home fence. For example, some cities have strict restrictions on how high a fence can be and whether or not they’re allowed in front yards. It’s a good idea to contact your city’s zoning department before hiring a contractor to ensure that they have all of the necessary information about your home and property.

Adding a fence to your property is an excellent investment that can increase the value of your home by up to 70 percent. But before you begin installing a fence, make sure to confirm your property lines with a professional to ensure that you’re not violating any laws or creating animosity with your neighbors.

A fence is an expensive home improvement project that adds curb appeal and a boost to your property value, but it can also negatively impact your neighbors. A new fence can deprive your neighbors of their views or convenient access routes, so it’s important to communicate with them before you begin construction. In addition, your neighborhood or community rules may limit the type of fence you can build, and HOA guidelines can be especially strict.

To make sure you’re building your fence within your property lines, have a professional land survey done or consult a plat map. If you choose to measure your lot by hand, take a long tape measure and compass to locate stakes along the perimeter of your property. Compare these measurements with those in the plat map or deed to ensure you’re accurate.

Another reason to study the plat is to identify easements on your property, such as those for utility or public use. A plat map will show these, and knowing where they are could make the difference if you ever have a dispute with your neighbor over who owns what part of your property.

If you’re planning on hiring a contractor to install your fence, make sure to ask for references and insurance documentation. The American Fence Association (AFA) recommends that homeowners hire contractors who can provide product samples, a contract and a certificate of insurance before beginning any work.

Finally, call your local utilities company and have any buried lines marked before starting construction. This will help ensure that you don’t damage any pipes or wires while digging holes for posts. For wood fences, you’ll need to treat them with a moisture sealant or stain to protect the wood from the elements and prevent rot or warping. A stain can be more costly than a paint, so consider this extra expense when budgeting your project.

Before you do anything else, it’s important to confirm your property lines. This is a vital part of fence etiquette, as you don’t want your fence to be built on someone else’s land by mistake. You can check your plat or consult the local records office for more information about where your property line lies, or you could hire a land surveyor to take a look for you.

Once you have the location of your property line established, it’s time to start measuring for your fence. Start by marking the corners of your yard with a stake (or paint or some other marker) and then measure from one corner to the next. This will give you the total perimeter of your yard in feet, which is the number you will need to divide by the width of a single fence panel, which is typically between 6 and 8 feet.

As you’re measuring, be sure to account for any trees, bushes, or other permanent obstructions that your fence may run near or around. You’ll also want to make note of any underground utilities that run through the area, like gas, power, or cable lines. These can be hazardous to dig into, so it’s essential to have them marked before you begin. In most areas, you can call 811 to get someone to come out and mark the locations of public utilities for free. At Asheville Fence, we always call this service before starting a job!

It’s important to take your time when measuring for your fence, as mistakes can be expensive. If you goof up on the measurements, it can lead to a lot of extra expense in terms of material and labor costs. Not only that, but a poorly-constructed fence can be dangerous for you or your family members who will be using it.

When you’re finished, you should have a complete diagram of your yard with the perimeter and all of the corners clearly marked. This will allow you to determine how many panels and gates you’ll need for your project, as well as how much wire, hardware, and other supplies you’ll need to purchase.

Before beginning construction, be sure to clear the fence line of any trees, bushes, or permanent obstructions. This can help ensure a more accurate installation while also preventing any damage or accidents during the building process. It’s also a good idea to locate any underground utilities that may be in the path of your fence. Call 811 or your local before-you-dig service to have any lines marked so you can avoid potential hazards and repairs later on.

You should also be aware of any features that will require special consideration before your fence is installed, such as slopes and contours. This will affect the amount of slope your fence should have, and the type of materials needed to support it. It is important to double-check your measurements before starting to make sure the plan you have in mind will work out, particularly for areas where a fence will be going up next to a driveway or a house.

Once you’re sure your measurements are accurate, it is time to start digging post holes. Begin with the corner posts first, then mark spots for all of the line posts. Your line posts will need to be spaced at intervals that are equivalent to the length of your panels, which is usually every 6 or 8 feet. You should also mark any end posts that will need to be placed, such as ones for your house or a gate.

When you are ready to begin installing the fence, be sure you have all of the necessary supplies, including a shovel, post hole digger, and any other tools you will need. It is always a good idea to purchase extra supplies ahead of time to prevent any delays or unforeseen expenses that could arise during the project.

As you’re putting in your posts, it is a good idea to use the twine you used for measuring to ensure they are all positioned correctly. This will help ensure that your fence is straight and level once it is finished, which can be difficult to accomplish if you don’t have the right tools for the job.

Types of Flooring

Flooring

Flooring Fairfield NJ is one of the biggest investments homeowners make. It’s also a critical design element that can impact the entire look of a room.Flooring

Hardwood floors add value to your home and are great for high-traffic areas. They’re also easy to clean and resistant to stains and scratches.

Hardwood floors have been a popular choice for centuries, offering timeless beauty that never goes out of style. The natural material has a warm, welcoming feel that instantly makes a space more inviting. It also increases your home’s value and is durable enough to last decades with proper maintenance.

Hardwood can be purchased in solid or engineered construction and in a wide range of grain patterns. The species of wood you choose will have a significant impact on the look and durability of your floor. You can even opt for reclaimed wood, which is often less expensive than new hardwood and can add a sense of history to your room.

When choosing a wood species, consider its Janka hardness rating and how durable you need your floors to be. Softer woods, like pine, can be scuffed or scratched more easily than hardwoods, such as oak. Oak is the most popular hardwood flooring choice because it’s a durable species that’s easy to work with and can be stained nearly any color you’d like.

Once you’ve chosen the type of wood and the color, decide whether you prefer a matte, satin, or semi-gloss finish. Matte and satin provide the least amount of sheen, making it harder to see scratches and scuffs. Semi-gloss offers some sheen but is not as reflective as gloss and may show marks more easily.

Before installation, your wood will need to acclimate to your climate, which can take two weeks. Existing flooring will need to be removed and furniture moved. The planks are then cut to size and sanded, which can create enormous amounts of dust that can be harmful to your health.

You can also choose to have your wood prefinished or stained onsite. If you opt to have your floors stained onsite, you can select a stain that complements your room’s décor and is suited to your lifestyle. You can also ask your installer to keep a sample of the stain in case you need to touch up scratches or dents.

Tile

Tile is a hard-wearing, long-lasting flooring material that looks beautiful in almost any room. It’s especially popular in kitchens and bathrooms, as well as in dining rooms and living areas. But before you start thinking about using tile for the floor of your home, it’s important to understand what differentiates flooring tile from wall tiles and how to choose a style that will complement your overall interior design.

Generally speaking, “tile” refers to thin flat coverings made from natural or manmade materials such as stone, metal, ceramic, and baked clay. They are used to form walls and floors in buildings, often over a concrete or gypsum base. Tiles can vary in thickness and size, with thicker tiles better suited for the floor because they add durability and can stand up to impact. They are usually fixed in place using a mortar base, can be designed to form intricate or simple patterns, and come in a huge range of colors, sizes, and finishes.

The most common type of tile for flooring is porcelain. It is dense, hardwearing, and impervious to water damage and can be produced in a wide array of textures and surface effects, such as wood, encaustic patterns, and natural stones.

Other types of tile for floors include ceramic, terra cotta, granite, and slate. These are usually harder and more durable than other types of tile, but they are also prone to cracking and discoloration if not sealed properly. They are best suited to rooms with low levels of foot traffic or can be covered by thick rugs to reduce the impact of footsteps.

Because of their hardness, most tile floors are cold underfoot and can feel stark in contrast to plush carpeting. They are also not very good at muffling sound, so they can echo in a room. Some people like to use the installation of radiant heating to help mitigate this issue, but it’s not a problem that everyone is going to want to address in their own homes. Despite these downsides, a beautiful tile floor can really elevate the look and feel of a home and add real value.

Concrete

Concrete flooring isn’t for everyone, but it can offer a stylish and unique design element in homes with the right decor. It’s also incredibly durable and hard-working, which is why it’s so popular for industrial and commercial floors. Concrete is a composite material that consists of Portland cement, water, and aggregate (gravel, sand, or rock).

Once poured and set, concrete floors can be finished in a variety of ways. They can be polished, waxed, etched, stained, or stamped to create a specific aesthetic.

Staining is the most common finishing technique for concrete floors, but it isn’t the only way to color them. You can also use concrete paint, acrylic staining, and spray overlay techniques to customize your floor’s look. The color of your concrete can help determine the overall style of your room; dark colors tend to make rooms appear larger, while lighter shades are more open and airy.

Texturizing is another popular finishing method for concrete floors. It involves dragging a brush or trowel over the surface of the drying concrete to leave different types of ridges. This can give the concrete a rough, gritty texture that increases traction and decreases slippage. It’s also used to make a more modern-looking surface by creating a speckled effect.

A more creative way to add color to your concrete floors is through acid etching or staining. These methods penetrate the surface of the concrete to tint it in a wide range of hues. You can also add flecks of colored glass or crushed marble to the concrete mix for added interest.

Concrete floors are extremely durable and hard-working, but they still require some care. They must be sealed or waxed regularly to protect the surface and prevent it from cracking, staining, or fading. You should also mop them frequently with a neutral cleaning agent to remove dirt and debris. The surface can be damaged by dropped objects, so be careful about where you place your furniture. Concrete is hard to dent, and it resists most chemical damage, but it can chip or scratch if you aren’t careful with your shoes or appliances.

Carpet

Carpet has long been the flooring of choice for many homeowners and commercial spaces. It is soft and warm underfoot, hides dirt and dust mites, and absorbs sound well. It also offers some of the best acoustic qualities of all floor types, making it an excellent choice for offices, schools, and call centers.

When comparing carpets, the most important factors to consider are fiber, face weight (or pile weight), twist, and pile density. The higher the face weight and denser the pile, the better the quality of the carpet. A quality carpet should have a minimum of 34–40 ounces of fiber and five twists.

The best-performing carpet fibers are nylon and polyester. Nylon is stain-resistant and doesn’t fade or mat down as easily as wool or other natural fibers. It is mold- and mildew-resistant, dries quickly, and doesn’t cause static. However, it is more expensive than other fibers.

Polyester is similar to nylon, but it is a bit cheaper. It is not as stain-resistant or durable, but it looks good and is moisture-resistant. It’s a great choice for high-traffic areas, and it is available in a wide range of colors.

If you’re looking for a carpet that feels luxurious and is soft, choose a premium cut-pile textured style. The twisted fibers create height and texture variations, which disguise dirt and make it easier to vacuum. This carpet type also shows footprints and furniture indentations less prominently than other types.

Loop-pile styles, such as Berber and sisal, have longer, twisted fibers that add a fuller body to the carpet and increase durability. They are suitable for heavy-traffic areas and are easy to clean.

There are also tufted carpets, which are made on massive looms that weave together bobbins of yarn. These are available in a wide variety of patterns and colors and can be very upscale and luxurious. Tufted carpets can be cut-pile or loop-pile.

Some of the most popular carpets these days are low-VOC, which means they don’t emit harmful VOCs into the air. This is an especially important consideration for homes, where we spend most of our time. Look for carpets that have a FloorScore or GreenGuard certification for the most eco-friendly options.

How to Choose the Right Material for Driveway Paving

Paving Contractor

A new driveway can significantly increase a home’s value. However, picking the right material to withstand traffic and weather conditions can take time and effort. Concrete is popular and affordable but could be better in colder climates. Asphalt, a popular second choice, looks great and should be sealed every three to five years. For professional expertise, visit SC Driveway Paving Charleston.

Paving Contractor
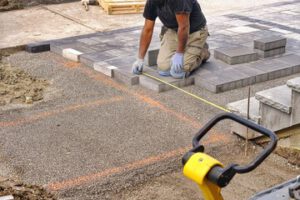
The cost of driveway paving can vary greatly depending on the type of materials used and the project’s size or size. Generally, asphalt and concrete are the most expensive options, while gravel and pavers are cheaper. However, it is important to consider all of the expenses involved with paving of your driveway to ensure you get the most value for your money.

Before the paving begins, the site must be leveled and cleared of all debris. This may include tree branches, stumps, rocks, and other debris that must be removed from the area. This process can take up to ten days and will significantly increase the total cost of the job.

In addition, the contractor will need to prepare the ground by grading and excavating the surface of the driveway. This will ensure the finished product is level and free of drainage problems. The cost of this labor will be included in the final paving estimate.

After the preparation work has been completed, the paving company will install the chosen material. While the choice of paving material is up to the individual homeowner, most people choose either asphalt or concrete. These two materials are relatively affordable and can be aesthetically enhanced with borders, colors, and stamped patterns.

Other options for paving the driveway include recycled rubber, which is eco-friendly and fairly affordable. It can also withstand cold temperatures better than other materials. However, it is prone to cracking and requires regular maintenance.

Some of the other choices for a new driveway include brick, natural stone, and decorative gravel. Each option has its pros and cons, so it is best to consult a professional before making a decision.

It is important to choose a material that will stand up to the climate in which you live. Some materials do not hold up well in hot weather, which can lead to early wear and tear. Additionally, certain plants are able to penetrate the surface of asphalt, which can cause damage. This can be avoided by using a more durable material, such as concrete or pavers.

Materials

When choosing a material for your driveway, it’s important to consider both function and appearance. Your driveway is not only a way to get from point A to point B, but it also adds curb appeal and helps set the tone for your home.

Asphalt, concrete, gravel and pavers are the four most common choices for driveway paving. Each one has its own unique advantages and disadvantages. Ultimately, the decision comes down to your preference and the climate in which you live.

Pavers are made of natural materials that seamlessly integrate with the landscape. They are durable and can withstand heavy loads, making them ideal for driveways. They are also easy to maintain and can last for a long time. However, pavers can be expensive, especially if you choose a more decorative design.

The first step in the installation process is removing any existing surface and preparing the ground for new paving. This is accomplished by leveling the surface and grading it to create an even slope. Then, a layer of gravel or crushed rock is placed over the grade and compacted. This is referred to as the sub-base. The thickness of the base is influenced by the region’s climate and type of soil, as cold regions with silt or clay require a thicker base than well-drained soil in warm areas.

After the sub-base is laid, the paving contractor applies the binder and runner-crush layers of the pavement. The binder is a black, jet-black bituminous substance that adheres the sand and stone together. It is heated to high temperatures in order to liquefy it and bond the sand and stone together.

A geo-textile fabric is then installed over the runner-crush layer to prevent the pavement from rutting. It is a thick, woven-nylon sheet that acts as a filter between the sub-grade and runner-crush, keeping them from mixing and providing stability. This layer also allows water to percolate through and back into the groundwater supply, rather than pooling and causing damage. Lastly, a layer of polymeric jointing sand is swept into all the joints and crevasses in the interlocking pavers to limit weed growth.

Installation

A driveway paving project is more than just digging up the ground and laying down some pavers. It requires a lot of planning and the right equipment to be done properly. Most of the time, a professional is hired to do the work. However, if you have the know-how and the proper equipment, you can save some money by doing it yourself. You can also choose from several different types of materials and designs for your driveway paving project. But before you decide on a particular material, you should consider the maintenance and cost involved.

A permeable-paver driveway is a great option for homeowners who want to reduce their carbon footprint and have an eco-friendly surface. The installation process is a little different than that of a traditional asphalt driveway, so it’s important to hire a team of professionals who have experience with this type of project.

The first step in the paving process is to remove any existing materials from the driveway area. This may include gravel or a previously paved space that is damaged or worn. The paving company will then dispose of this material.

After removing any existing material, the paving contractor will prepare the area for laying the pavers. This includes excavating the site and testing the soil for permeability. This process is critical, as it ensures that the new paving will be able to absorb and transport water without any issues. It’s also important to check for underground pipes and cables. This can be a lengthy process and is often expensive, but it’s essential to do a thorough job in order to have a durable, long-lasting driveway.

Once the area has been excavated and all utilities have been located, a base can be installed. This will typically include a layer of crushed stone and sand. This layer is designed to help hold the pavers in place and prevent them from moving over time.

The pavers themselves can be made from a variety of materials, including brick, rock, or concrete. They are available in a wide range of shapes, sizes, and colors, so you can choose the ones that will best suit your home’s style. Once the pavers have been installed, they are sanded down and sealed to ensure that they will last for a long time.

Maintenance

Block paving is a durable material and can last a long time if it is looked after properly. However, over time the paving can become dirty and look untidy. This can be caused by oil stains or by the growth of moss or weeds. It is important to keep your paved area clean and tidy as this will help to prevent the growth of these unwanted plants and to keep your driveway looking its best.

Different types of paving require different maintenance procedures. Some are more susceptible to damage than others, so it is important to understand what steps should be taken to protect your investment and maintain its longevity. These procedures can include sweeping, washing, and regular cleaning of the paving. It is also a good idea to use a pressure washer on the surface, as this can remove dirt and other materials that may damage the paving.

To keep your paving in optimum condition, you should sweep the surface regularly with a soft brush or broom. This will remove any accumulated dirt and dust that can be easily brushed away. You should also clean the paving using a bucket of water and non-acid cleaner or soapy washing up liquid to ensure that any remaining muck is removed. After cleaning the paving, you should always brush the joints with sand to prevent them from becoming overgrown with moss and weeds.

If your paving is exposed to the elements, you should consider protecting it with a concrete barrier. This will prevent deterioration and cracking and protect your vehicle from impact damage. You should also make sure that your driveway is not too high above the surrounding soil, as this could cause drainage problems.

Some paving is permeable, which means that it allows water to pass through and avoids puddling or surface icing. This is ideal if you live in an area with high rainfall or in a wet climate. Permeable paving is also environmentally friendly and can lower your cooling costs. However, it can be expensive to install and requires regular resealing to maintain its quality.

Emergency Roofers

Roofing

An emergency Roofers Colorado Springs can help a property owner by sealing and tarping up their building to limit water damage until permanent repairs can be made. Emergency repair services are often needed after major storms, tornadoes and derechos.

RoofingA water stain on your home’s ceiling may need to be addressed promptly but may not necessarily constitute an emergency roofing situation. Here are some common types of emergency repairs:
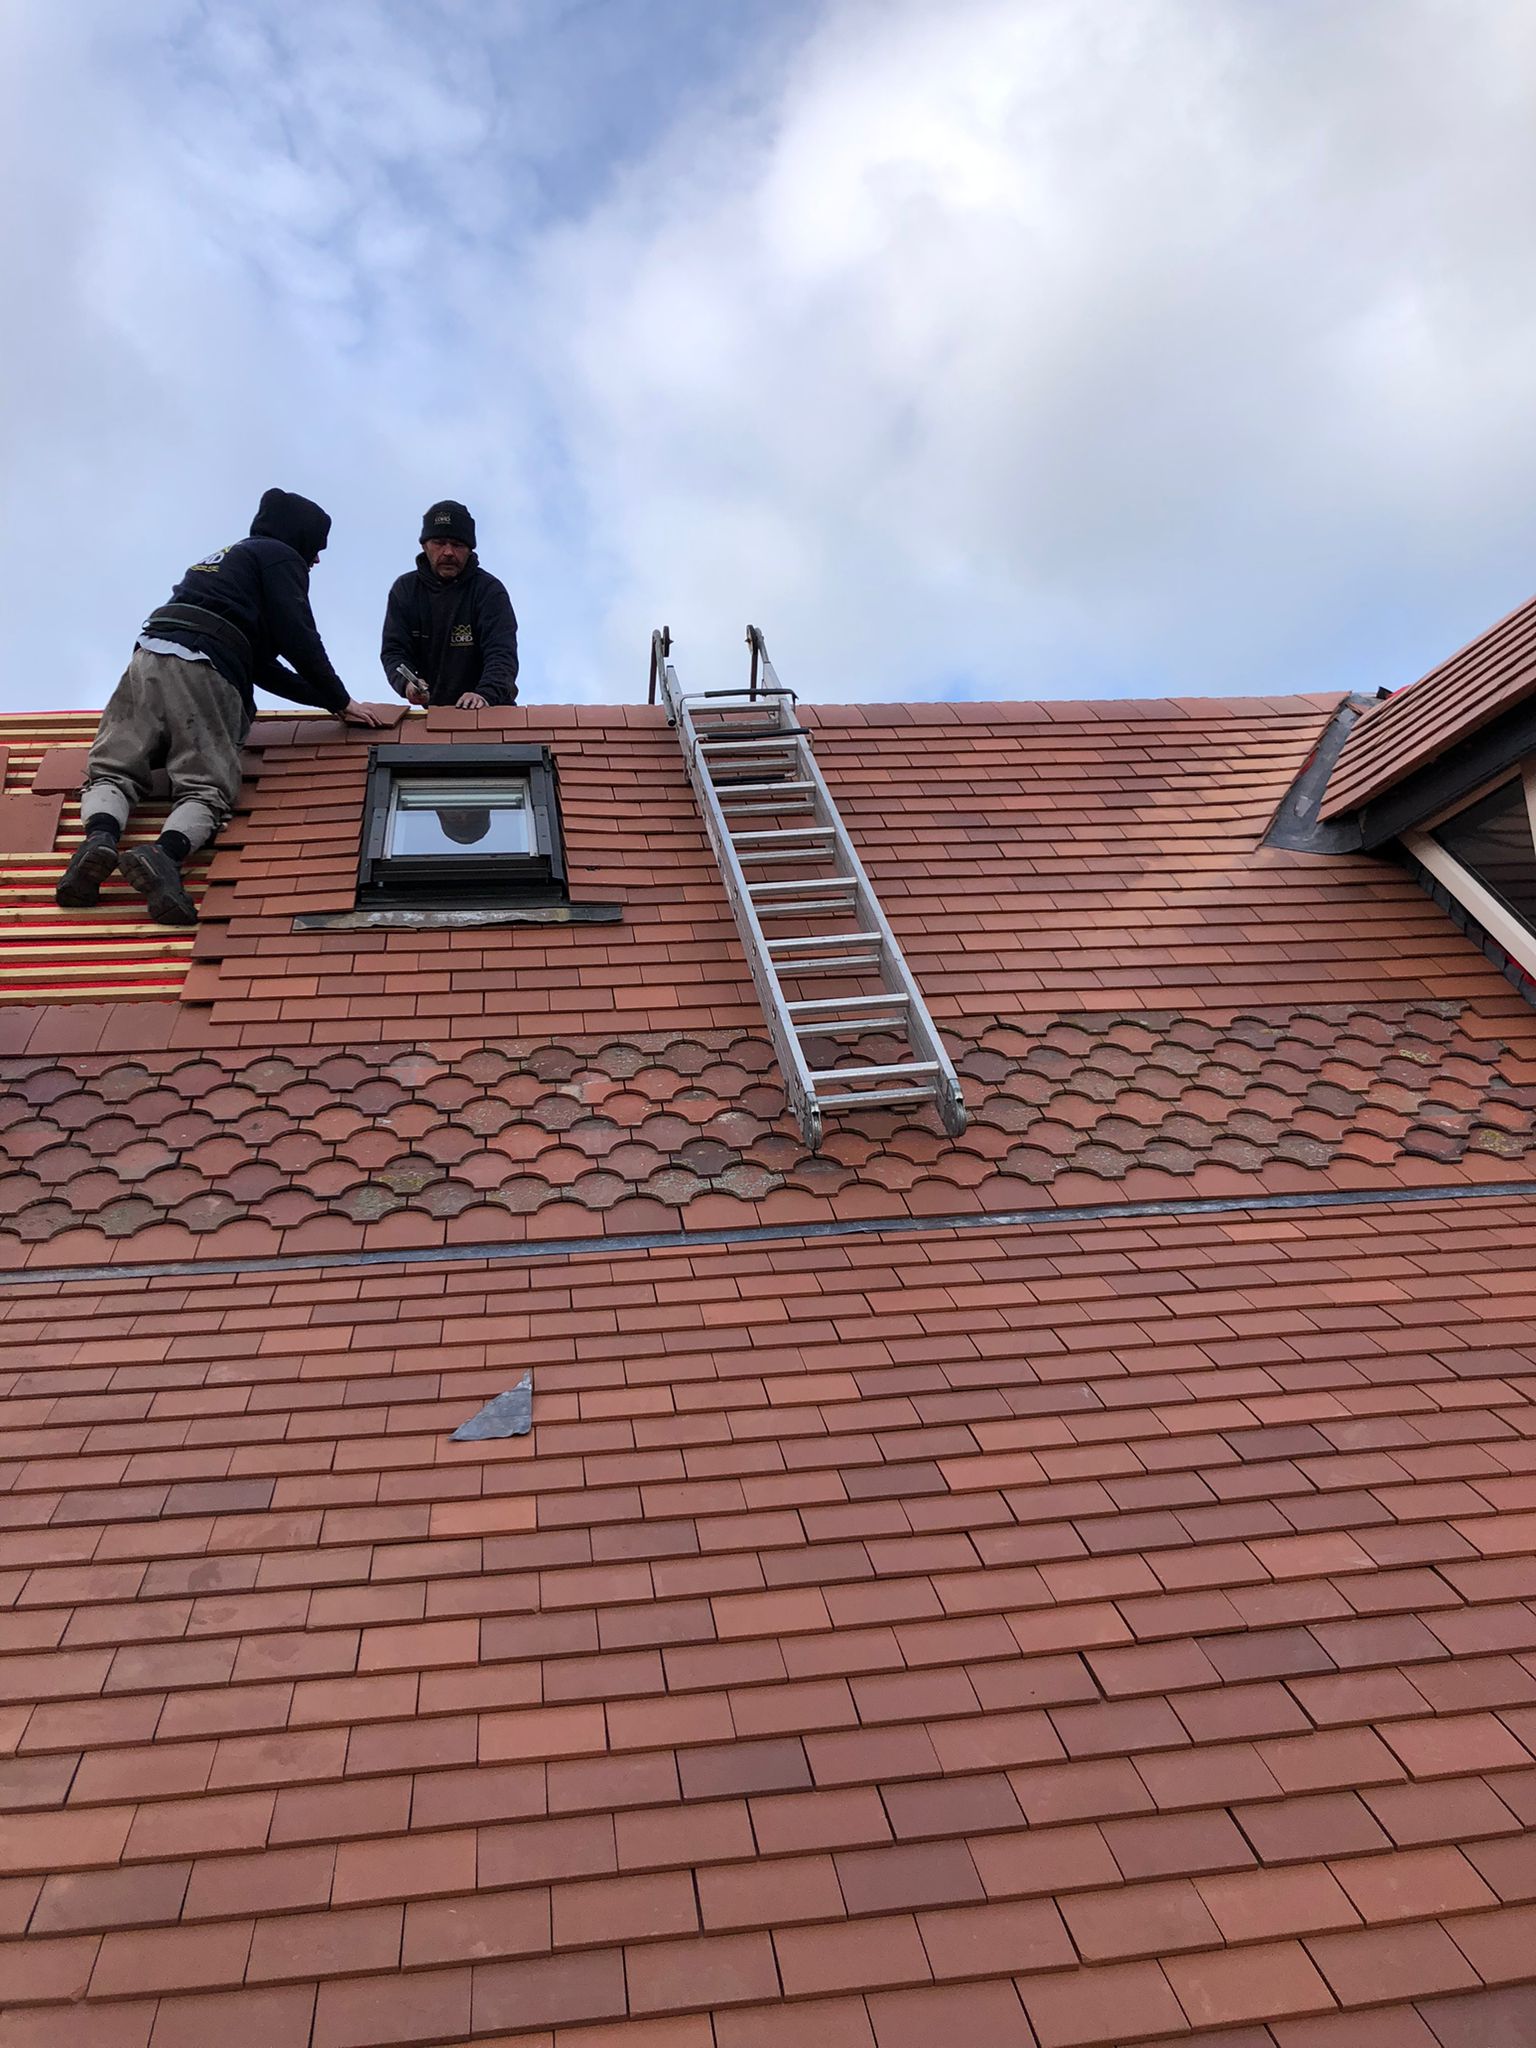
When a storm hits, it can cause damage to your roof. This can lead to leaks that will quickly damage your home and may create mold or mildew in the ceiling of your home. If you notice that your roof is leaking, it is a good idea to call an emergency roofing company immediately. A skilled emergency roofer will be able to assess the problem and find the source of the leak. They will then be able to repair the leak and provide you with a permanent solution for your roof.

Whether it’s from a big storm, heavy rains, or simply age and wear, roof leaks can be serious problems that require immediate repair. The most obvious sign of a leak is the presence of puddles on your floors. However, there are other subtle signs that you should watch for that may indicate the need for emergency roof repairs.

Some of the most common causes of a roof leak are missing shingles, cracks in the attic or walls, and holes caused by rodents. It’s important to keep an eye out for these problems, and have an experienced roofer inspect your roof regularly to ensure it is in good condition.

A good emergency roofer will be able to quickly respond and will have the tarps, ladders, jacks, and scaffolding needed to access your roof. They will also have a variety of tools and supplies that can be used to stop the flow of water into your home until the roof can be repaired.

All roof leaks should be considered an emergency, regardless of their size and scope. Even the smallest leak can quickly grow into a bigger problem that will require more extensive repairs down the road. Having a professional roofer on your side is the best way to ensure that any leaks are dealt with as quickly as possible, and that you will not have further problems in the future. For this reason, it is important to have the contact numbers of an emergency roofer on hand so that you can quickly contact them in case a problem arises.

Damaged Shingles

The roof is one of the most important structural components of your home, protecting it 24/7 from outside weather conditions and other threats. So, it’s a major cause of alarm when the roof becomes damaged and begins to leak. This type of damage can quickly lead to serious problems in your home’s interior, including rot and mold.

If you notice water spots on the ceiling or a musty smell coming from the attic, it’s time to call for emergency roofing services. Roofing professionals are experienced in performing emergency roof repair and can help you identify the problem and determine how severe it is.

Emergency roof repairs are needed when shingles are damaged or missing from the roof. Damaged shingles are usually caused by severe weather, such as high winds or hail. However, shingles can also become damaged due to roof neglect or improper maintenance.

If you have a shingle roof, you should check for damage on a regular basis after storms or other events. Look for the following signs of damage:

Cracks in a shingle that are soft to the touch. A change in color on a shingle that exposes the asphalt. The granules are knocked off of the shingle, exposing the roof beneath it. If you find granules in your gutters, this could indicate that the shingles are deteriorating or are leaking.

Missing shingles are a clear sign of roof damage that requires immediate attention. Check the surrounding shingles for signs of damage, such as creases or punctures. If the shingle is unsealed, you should contact an emergency roofer for a roofing inspection immediately.

Another common type of roof damage is caused by pests. Infestations of squirrels, woodpeckers or other critters can leave lasting damage to a roof. They may chew through shingles or other roofing materials, leaving holes in the roof.

Many homeowners try to perform do-it-yourself emergency roof repairs, but this is dangerous and often illegal. It’s not only difficult to work on a roof without proper safety equipment, but it’s likely to void your homeowner’s insurance. Instead, call a professional emergency roofer to inspect the damage and perform any necessary repairs.

Tree Damage

Your roof is your primary defense against harsh elements that certainly don’t belong in your home, including wind, rain, and sun. Unfortunately, damage to your roof can occur in an instant — like when a tree falls on it — or slowly over time, allowing water and other things into your home until you realize there’s a problem. In either case, it’s essential to call an emergency roofer to address the issue as soon as possible.

When a tree or branch falls on your roof, it’s an emergency situation because it can cause structural damage to the house and if water leaks through, can lead to serious interior damage and possibly even mold growth. While you wait for the emergency roofers to arrive, it’s important to stay calm and do whatever you can to keep yourself and your family safe.

Depending on the extent of the damage, you may need to make temporary accommodations for yourself and your family while the roof is being repaired. This may mean staying with friends or family members or renting a hotel room until the work can be completed. If you decide to go with the latter, it’s a good idea to check with your insurance company to see what coverage you have that could help pay for accommodation and other expenses.

After assessing the damage, an emergency roofer will typically affix a tarp or temporary patch on your roof to protect it and your belongings. This can also help prevent rain or other inclement weather from causing further damage until the roof is replaced.

You can take steps to avoid tree damage to your roof by keeping trees properly trimmed and removing any dead branches. It’s also a good idea to get an annual inspection by a professional arborist to assess the health of your trees and recommend any necessary maintenance. This will help to reduce the risk of them falling on your house during a storm or due to disease or insect infestations that you couldn’t have prevented.

Hole or Crack in the Roof

A hole in the roof is an emergency that requires immediate attention from a roofer. It will allow water, snow and ice to seep into the house, which can lead to structural damage and rot. If the hole is left untreated, it will only get worse.

The first sign that there is a hole in the roof is damp areas in the attic and walls, which can be caused by moisture from the leakage. If the water damage is extensive, it can also cause sagging areas on the ceiling and walls. Other signs of a hole in the roof include missing or cracked shingles, black marks on the roof and a musty smell.

In some cases, a small crack or gap in the roof may be harmless. However, a gap can be an entry point for animals, which can tear or gnaw at the insulation and wires in your attic. In addition to causing expensive repair bills, wildlife in the attic can create a foul odor in your home.

It is important to inspect your roof on a regular basis, especially after severe storms and heavy rains. A professional roofer can help you find any problems with your roof and offer emergency repairs to avoid serious damage. Some roofers also offer a range of roofing financing options, which can be an ideal solution for homeowners who cannot afford to pay for emergency repair work upfront.

Emergency roofers should be fully licensed and insured, and they should provide a warranty on their services. They should also be well-versed in the different components of a roof and know how to spot problem spots. It is also a good idea to check with your insurance company, as some policies may cover the cost of emergency roof repairs.

Some emergency roof repair companies are available 24/7. This means that they can be called in the middle of the night to fix a problem. However, some of these companies are not qualified and may not offer high-quality repairs. In addition, they might overcharge for their services. Hence, it is better to look for an experienced and reliable emergency roofer in Tulsa, OK.